How to Get Started with Claude Code: A Beginner's Complete Guide
From installation to your first real coding session - everything you need to go from zero to productive with Anthropic's terminal-based AI coding agent.
Best For
- Developers new to AI coding tools
- Vibe coders wanting a terminal-native workflow
- Students building side projects faster
- Founders prototyping without a full team
Requirements
- A Claude Pro, Max, Team, or Enterprise subscription ($20/month minimum)
- macOS, Linux, or Windows 10+ with WSL
- A terminal (macOS Terminal, PowerShell, or any Linux terminal)
- Git installed (strongly recommended for rollbacks)
- A code project to work on
Video Tutorial
What Claude Code actually is
Claude Code is Anthropic's terminal-native AI coding agent. Unlike tab-completion tools that suggest a line at a time, Claude Code reads your entire codebase, edits files across multiple directories, runs commands, handles Git operations, and reasons through multi-step problems - all through natural language. You describe what you want, it shows you what it plans to do, and you approve or reject each change before anything is written to disk.
It is available as a CLI tool, a desktop app, a VS Code and JetBrains extension, and through claude.ai on the web. All interfaces share your subscription. Most serious coding workflows happen in the terminal CLI or the VS Code extension - that is what this guide focuses on. Claude Code launched in May 2025 and reached over $1 billion in annualized revenue by November 2025, which tells you how fast developers adopted it.
Install it in under a minute
The native installer is now the official method. Do not follow older tutorials that recommend `npm install -g @anthropic-ai/claude-code` - that approach is deprecated. Use one of the following commands based on your OS.
On macOS or Linux (including WSL), open your terminal and run: `curl -fsSL https://claude.ai/install.sh | bash`. On Windows PowerShell, run: `irm https://claude.ai/install.ps1 | iex`. On Windows CMD, run: `curl -fsSL https://claude.ai/install.cmd -o install.cmd && install.cmd && del install.cmd`. Native installations auto-update in the background. If you are on macOS and prefer Homebrew, run `brew install --cask claude-code` - but note that Homebrew does not auto-update, so run `brew upgrade claude-code` manually to stay current.
After installation, open a new terminal window and run `claude --version` to confirm it installed correctly. If the command is not found, restart your terminal - PATH issues after installation are the most common problem.
Log in and start your first session
Claude Code requires a Claude account. Run `claude` in any directory and you will be prompted to log in on first use. Authentication opens in your browser - sign in with your Claude Pro, Max, Team, or Enterprise account, return to the terminal, and you are authenticated. Credentials are stored locally in `~/.claude/` so you only do this once. If you are using the Anthropic Console for API access instead of a subscription, that works too.
To start a coding session, navigate to your project directory and run `claude`. You will see a welcome screen with recent conversations and session info. From here, type `/help` to see available commands, or just start talking to it. Ask something like 'what does this project do?' and watch it read your files and summarize the codebase. This is a good first step before making any changes - let it orient itself.
The commands you will actually use
You do not need to memorize every slash command. A handful cover the vast majority of sessions. `/help` shows everything available. `/clear` wipes the conversation history when the context gets polluted with failed attempts - this alone will save you a lot of frustration. `/model` lets you switch between Sonnet and Opus mid-session. `/compact` compresses the conversation to free up context when you are deep into a long task.
From the terminal, `claude "fix the build error"` runs a one-time task without opening an interactive session. `claude -c` continues your most recent conversation. `claude -r` lets you resume a previous session by selecting it from a list. Press `?` inside a session to see keyboard shortcuts, and use Tab for command completion. Type `/` to browse all available commands and skills.
Plan Mode - use this before any complex task
Plan Mode is one of the most important features for avoiding mistakes. When you type `/plan` before a request, Claude shifts into a reasoning-first mode: it reads the relevant files, traces dependencies, outlines what it will change and in what order, shows its reasoning, and then waits for your approval before executing anything. Nothing is written to disk until you say go.
Use Plan Mode for anything that touches more than two or three files, any refactoring task, and any feature that crosses module boundaries. For example: `/plan` followed by 'Refactor the authentication module to use JWT tokens instead of session cookies' will produce a step-by-step breakdown of every file that needs to change and why. Reading that plan is often as useful as the final output - it teaches you your own codebase.
Pick the right model for the job
Claude Code supports Sonnet and Opus. A simple heuristic: use Sonnet for about 80% of tasks - it is faster, cheaper, and handles most everyday coding work. Switch to Opus for complex multi-file refactoring, architectural decisions, or anything where you need deeper reasoning and do not mind slower responses. Use `/model` inside a session to switch, or set a default in your settings.
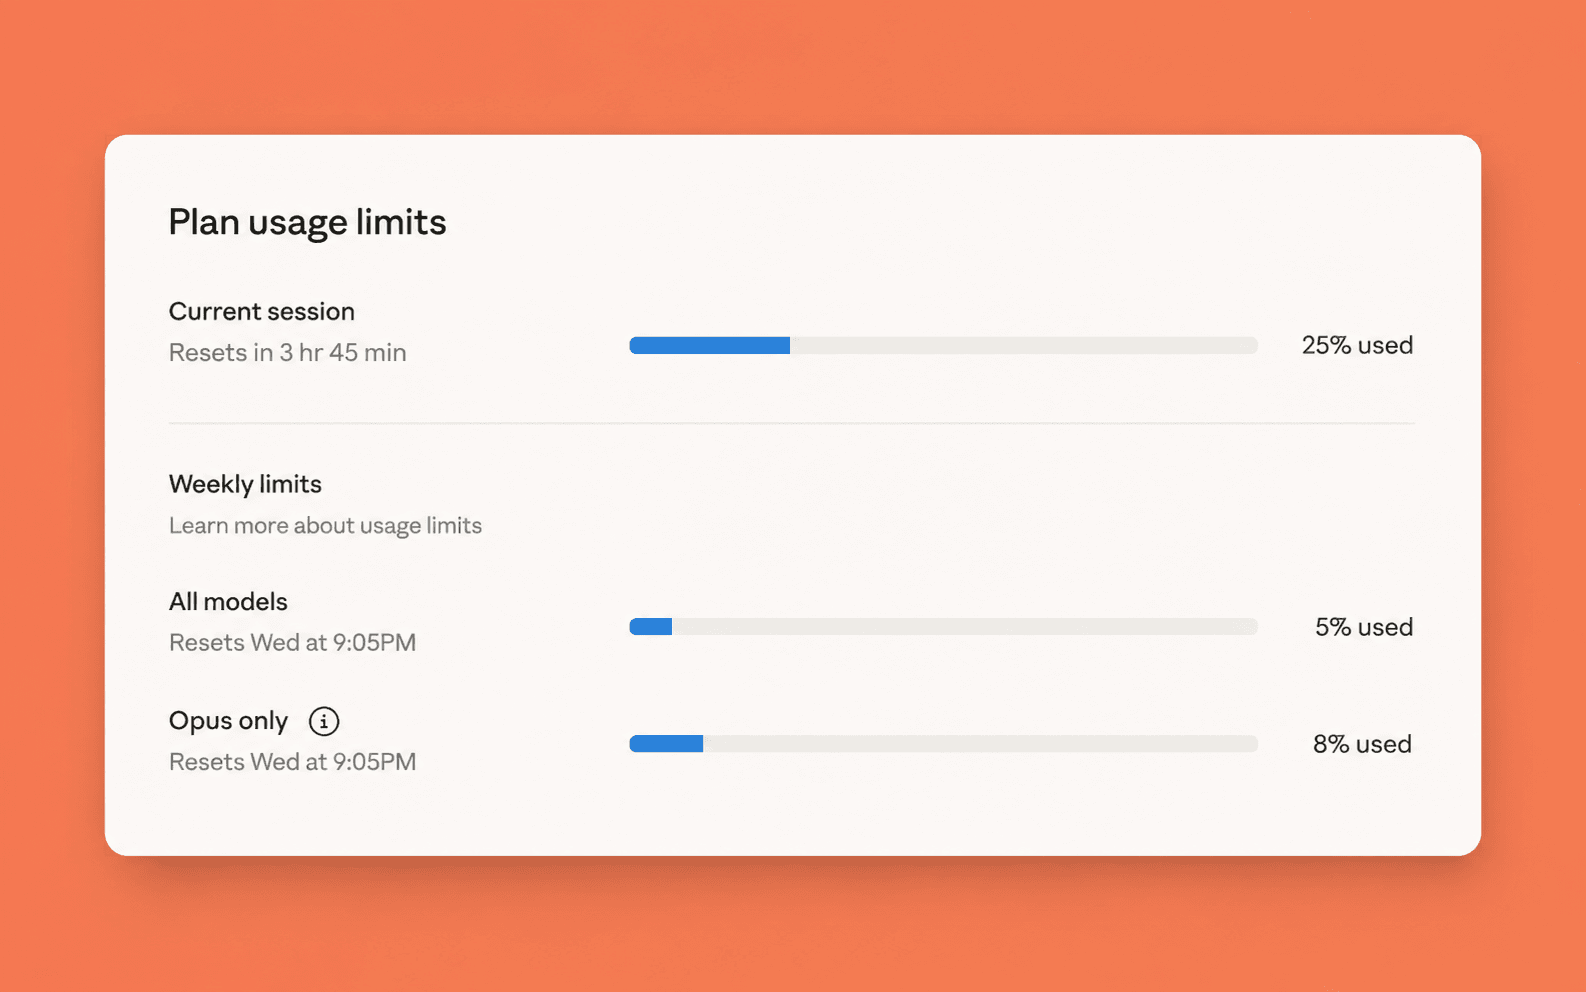
If you are on a Claude Pro plan ($20/month), you have usage limits that reset every 5 hours with no overage fees. Heavy sessions across multiple days can hit a weekly ceiling even if each 5-hour window has headroom. For intensive daily use, Claude Max ($100-200/month) gives significantly more capacity. Start with Pro and upgrade if you find yourself hitting limits frequently.
CLAUDE.md - give it a memory of your project
Every time Claude Code starts in a directory that contains a `CLAUDE.md` file, it reads that file automatically. This is how you give it persistent context about your project without repeating yourself every session. Put your tech stack, coding conventions, preferred patterns, run commands, and anything else Claude should always know into this file.
A minimal `CLAUDE.md` for a Next.js project might look like: 'Stack: Next.js 14, TypeScript, Supabase, Tailwind CSS. Run dev server: npm run dev. Prefer server components by default. Follow the existing file naming conventions in /app. Do not modify /lib/utils without asking.' The more specific you are, the more consistent Claude's output will be. You can also create a global `CLAUDE.md` in your home directory for preferences that apply across all projects - things like your preferred comment style or general output format.
Git is your safety net - use it
Claude Code can handle Git operations conversationally. Tell it 'commit my changes with a descriptive message', 'create a new branch called feature/user-auth', or 'show me the last 5 commits' and it will execute them. But more importantly: keep Git active in your project so you can roll back anything Claude does that you do not like.
The workflow that works well is to commit before starting any large Claude session, let it work, review the diff, and either commit or revert. This gives you a clean checkpoint before each AI-assisted task and eliminates the anxiety of letting an agent make changes across your codebase. You can also ask Claude to help you resolve merge conflicts, show file diffs, or stage specific files - all through natural language.
Working inside VS Code
If you prefer to stay inside your editor, install the Claude Code extension from the VS Code marketplace (search 'Claude Code' in Extensions, Cmd+Shift+X on macOS). The extension provides the full Claude Code experience with inline diffs, @-mentions for referencing specific files, Plan Mode, and conversation history - all inside your IDE.
The CLI remains the most complete interface - a few features like MCP server configuration and certain slash commands are CLI-only. But for most coding workflows, the VS Code extension is just as capable and keeps everything in one window. JetBrains IDEs are also supported if that is your environment.
A prompt structure that gets better results
Vague prompts produce vague outputs. The more context and specificity you give Claude Code, the better the result. This structure works well for most coding tasks.
When things go wrong
- Claude keeps producing the wrong output despite corrections: Stop correcting it in the same session. Use /clear to wipe context, then start with a better, more specific prompt. Long sessions with accumulated failed attempts pollute the context and make things worse.
- Command not found after installation: Restart your terminal. PATH updates from the installer are not applied to already-open terminal windows.
- Hitting usage limits quickly: Check you are not accidentally running Opus on simple tasks. Switch to Sonnet with /model for everyday work. If you hit limits consistently, consider upgrading to Claude Max.
- Claude modifies something you did not want it to: Review the diff carefully before approving. If it already went through, use git revert or git checkout to restore the previous state - this is why Git is non-negotiable.
- Context window feels full or responses slow down: Use /compact to compress conversation history, or start a fresh session with claude -c to continue from where you left off with a cleaner context.
Before you ship anything Claude wrote
Brian Weerasinghe is the founder and editor of AI Eating The World, where he covers artificial intelligence, tech companies, layoffs, startups, and the future of work. His reporting focuses on how AI is transforming businesses, products, and the global workforce. He writes about major developments across the AI industry, from enterprise adoption and funding trends to the real-world impact of automation and emerging technologies.